
Quick Start to Creating a New Event
If you are in a hurry, this is the ‘Quick start’ that represents the minimum required actions to create a new event. Don’t forget that you can always go back later and edit or add the optional details to your event.
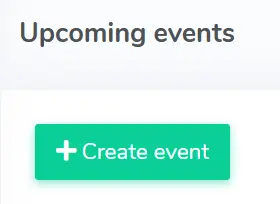
You start by first clicking the text “+ Create Event”, located near the top of the page, below the text “Upcoming Events”.
After that, you will just need to complete the input boxes for the event name, the event dates and time, the types of tickets, and the ticket prices! These specific input boxes are located within the Event Basics section. Then click Finish to successfully create your event!

About Creating Events
The following is an overview that describes the Events page and creating an event.
This instructional guide is a strategic overview. ThunderTix, as a ticketing website, offers many options for creating events for all types of organizations. Since every venue and event can be different, this guide cannot go over all possible variations.
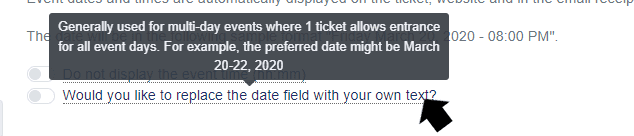
It’s important to note that any text underlined on the ThunderTix website, like the text within the picture below, can be hovered over with your mouse to display a brief explanation.
Overview
Event Creation
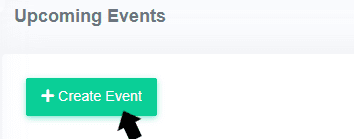
Click on “+ Create Event” to go to the event creation page. This is where you will create a new event and begin selling tickets right away. You’ll be able to establish ticket prices, the event dates, emails sent out to buyers, and more. Once you finish a section, you can either click finish or click on the next section to complete more customization of your event.
Embed Codes
Embed codes provide you the needed HTML to bring your events from ThunderTix seamlessly into your website. These Embed codes are available either as a link (URL) or as an iFrame. Additionally, these codes embed directly into a page on your website. To embed these codes, you simply “cut and paste” into any existing web page.
The following is a list of ways you can connect your ThunderTix events to your website:
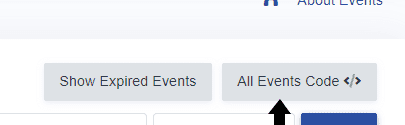
- All Events Code – All events (that are BOTH active and public) and/or packages from your website (available as a list, calendar or date search)
- A single event/package from your website
- Bypass the event description and image to go directly to a list of the event’s dates
- A single date’s ticket quantity selection page (or seating chart for reserved seating events)
Visit the Embed codes tutorial page for more explicit instructions on this topic.
Creating Your Event
Creating a new event means exactly what you would expect (adding the names, dates, and times for the event itself as well as for the ticket). You create your event in a linear progression. We ask for the required information first, then many different options and extras.
As you go about creating a new event, you will go through these different sections listed below:
- Event Basics
- Virtual Events Option
- Advanced Date Display Options
- Advanced Ticket Options
- Shipping and Fees
- Email Options
- Marketing Options
- Other Options
These sections are below the event basics section after clicking “+ Create Event”. Follow the instructions under each section title below to make your event, including all options and extras. Don’t forget that only a few of these steps are required, you do not have to complete all the steps listed below.
Event Basics

- Type your event name into the first input box provided.
- Select general admission or your desired seating chart (learn more about reserved seating here). If your event is General Admission, enter in the capacity here.

- Select your event time.
- Select whether your event repeats (if it’s a daily or weekly occurring event).
- Click “Add Another Date & Time” if your event has more than one performance date.

- Enter a name for a ticket type in the input box, located underneath the text “Name” (Examples of ticket types are “Adult”, “Child”, or “General Admission”).

- Enter the price for that specific ticket type in the input box located underneath the text “Price” (Example: “10.50”).
- Click the hourglass icon to add automatic ticket price changes that will increase the ticket price as the event approaches. Read more about Dynamic Pricing.

- The first input box starts today, or now as shown, and in the other, enter the number of days prior to the event when you want the price to change. This is commonly used to offer early bird pricing for a limited time and also to increase the ticket price on the day of the event.

- To set the next price, hit this plus button, enter your new price, with the day parameters you desire.

- Check or uncheck the box for tax. You can set up your tax rate in the checkout tab of your account settings.
- Enter a description for that specific ticket type in the input box located under the text “Description”, if you think customers need additional information (This description will be shown to customers when they hover their mouse over the ticket type name).
- In the input box, under the text “Capacity”:
- If you only have one ticket type for your event, leave this blank.
- If you have multiple ticket types for your event and you have a limit to how many of this ticket type can be purchased, enter that number in here. (It is rare that a capacity is set per ticket type. For example, this is mainly only used by events offering limited VIP tickets).
- Enter an order limit for the ticket type, in the input box, located under the text “Order Limit”. (This is not recommended. This is only used if you absolutely need to limit the amount of ticket types customers can buy per order. Usually camps, registrations, or conferences might use this feature).
- If you want this ticket type to only be available for administrators of your account, click the “Public” button to change it to private, located under the text visibility. (You can use this feature to give your staff a special price on tickets.)

- Click “+ Add Another Ticket”, if you offer more than one ticket type, and then repeat steps 1-7 for each ticket type that you offer.

- Enter in any details you want the public to know about your event into the “Create a Description” input box.

- Click on the browse button, located under “Add Event Images”.
- Select an image off your computer to represent your event (if you add multiple images, we’ll create a slideshow of all images automatically).
At this point, you’ve entered all of the required fields to build your event and you could select Finish and save the event. However, there are plenty more advanced options at your disposal, and while they are all optional, they cover the fine grained options you might need to make your event a success.
Below the Event Basics, you can see the rest of the event options, click on these sections to complete any of your desired options. 
Virtual Event Options
- If your event is virtual, select the toggle for ‘Is this a virtual event?’
- Select the method for your virtual event.
- Zoom integration with Zapier
- Other
Advanced Date Display Options
- If you would like your tickets to not go on sale immediately, click on the first input box with the calendar icon, located under “Setting the Public Sale Date”.
- Select, on the calendar, what day you want your tickets to go on sale.
- Pick the time below the date picker to set what time you want your tickets to go on sale. Once you have entered a new activation date, the option to enter a pre-sale announcement will appear.
- Select when to display the pre-sale announcement.
- Enter in an event pre-sale announcement that will appear in place of your regular event description until your ticket sale activation date. (We suggest you enter your original event description here and add a line stating when tickets go on sale).

- Click on the input box, located under the text “setting the expiration”.
- Select what day and time you want your tickets to stop being on sale. (The preset expiration date is at midnight, central standard time, on the last day of your event.)
- Enter in an event post-sale announcement (a common example is “Tickets only available at the door”). This replaces the original event description either when tickets sell out, the event deactivates, or on a specific date of your choice.

- Select when to display the post-sale announcement.
- If you would like to replace the ‘Sold Out’ message, enter in your desired message under “Hide ‘Sold Out’ message when no tickets remain”.

- Click the toggles next to “Do not display the event time” if you do not want the event date and time displayed on the ticket, confirmation email, and website. If you would like to replace the event date and time with your own text, click the corresponding toggle and enter your desired replacement text into the box.

- Choose how the public can access your event. (The important difference is that semi-private events are not shown in your full events list and can only be accessed with a unique link. Private events are only accessible to administrators that are logged in to your box office portal.)

- If you have event restricted users, select what users you want to have access to this event under “Logged In Access to Specific Events”.

To see Event Restricted Users go to Event Manager > select ‘Manage’ for the specific event > User Access.
- Click finish or click “Advanced Ticket Options” to see more options for your event.
Advanced Ticket Options
- Enter a maximum for how many tickets a customer can purchase per order. ThunderTix allows a 50 ticket limit for reserved seating and 100 for general admission events to the public.

- Enter the inventory threshold when you want customers to start seeing how many tickets are remaining, and we’ll display a message such as, “Only 8 tickets left!”

- Enter at what number of remaining tickets you want to display the option to customers to add themselves to the waiting list. Enter a zero in the box to make the waiting list option display when your event sells out. Leave this box blank if you want to disable the waiting list.

- Add ingress times to better control traffic as attendees arrive. Enter the amount of minutes prior to the event they can arrive, for example 60, with a capacity on attendees that can select this time.

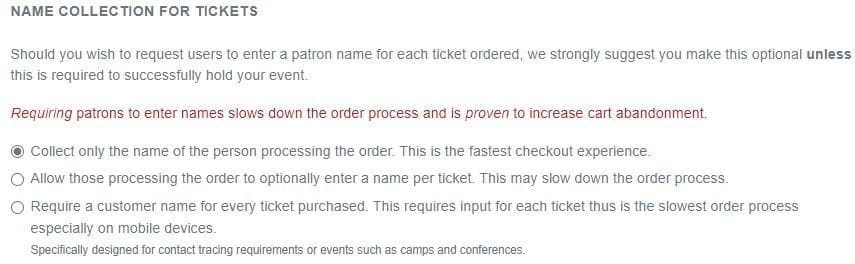
- Click whether you want to not request a name per ticket, optionally request a name, or require a name per ticket under Name Collection for Tickets. For standard events, we do not suggest requiring a name because it slows down the ordering process.
- You also have the option to customize the “Buy Tickets” button. By default, the main event listing shown to the public uses a button labeled, “Buy Tickets”. To change the “Buy Tickets” button to something else, just enter what you would like to change the wording to in the field below.

Shipping and Fees
- Under “Optional Fees”:
- If you only want customers to pay the price of the ticket, skip to the next section, titled “Email Options”.
- If you want to bring in additional revenue beyond the ticket price, follow these steps below.
- Enter a name for your additional fee in the “Name” input box.

- If you want your additional fee to be a set price, enter that price in the “Price” input box (For example, “2.00”).
- If you want your additional fee to be a percentage of how much a customer is paying either per ticket or per order, enter that percentage in the “Percentage” input box (For example, “2.75”).
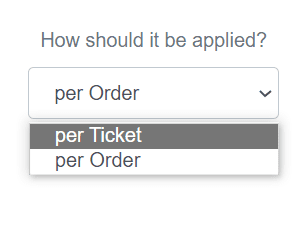
- Decide whether you want your fee applied per every ticket a customer buys or per each customer’s order. Click on the dropbox, located under the text “How should it be applied?” and select either “per Ticket” or “per Order”.
- Under the “Type” box, select Public if you wish to apply this fee to all public purchases on your website, and Private if you wish to only charge this fee to box office purchases.
- Click “+ Add Another Fee”, if you want to apply more than one fee. Then repeat steps 1-4 for each fee.

- Under “Shipping Options”:
- If you only offer Print-at-Home tickets to customers, you don’t need to create any shipping options since their tickets will be emailed to them upon completing their order. However, you can put Print-at-Home as a shipping option if you still want to show the electronic delivery option. Follow the steps below to add this. If not, skip to Email Options
- Otherwise, if you have multiple options or you don’t want to offer the Print-at-Home tickets, follow each step below.
- Enter a name for the type of shipping option you will be providing to your customers (This could be “Will Call”, “FedEx”, etc.).

- Enter the price for your shipping option. ( For example, for “FedEx”, you would put the price it costs you to ship it.)
- Click the “Enabled” button under the text “Print-at-Home PDF” if this shipping option isn’t the Print-at-Home ticket option. Doing this will disable the PDF ticket or eticket.

- Click “+ Add Another Shipping Option”, if you offer more than one shipping option. Then repeat steps 1-5 for every shipping option you offer to your customers.

Email Options
- Under “Print-at-Home PDF Tickets”:
- Make note of the size and format requirements for the image that you can upload onto your ticket. This image could advertise other upcoming events you’re hosting, provide a coupon for future purchases at your venue, or you can utilize the space as a part of an event sponsorship package for sponsor ads.
- Take advantage of the viewable PDF template to see what the ticket will look like (to do this, click on the text “View PDF Template”).

- Click on the browse button, located under the text “Upload an image or advertisement for your Print-at-Home ticket.”
- Select an image off your computer for the advertisement space on the ticket.
- If needed, add a brief description or message to the PDF tickets (For example, “Doors Open at 8:00 p.m.”).

- Under “Email Reminders and Post Event Surveys”:
- Select the checkbox for “Would you like to send an email reminder a few days before this event?” if you would like to send email reminders for the event.
- Select the checkbox for “Would you like to send a post event email to thank or survey your customers?” if you would like to send a survey after the event.
- If you can click on the checkbox, then check it.
- If you can’t click on the checkbox, then you need to go to the Billing and Usage tab in your account settings, and enable email reminders.
- Under “Confirmation Email”:

- All customers receive an email confirmation upon purchase. Please enter the text you’d like customers to see at the start and end of those confirmation emails.
- Customize the top and bottom of the confirmation email.
- Enter into the first input box, under “Confirmation Email”, what text you would like at the top of the confirmation email receipt sent out to customers.
- Enter into the second input box, under “Confirmation Email”, what text you would like at the bottom of the confirmation email sent out to customers. (Venues commonly use to inform customers about where to park, what to bring, etc.)
- Under “Emails For Reservations”:

- Add the content you wish to appear in the confirmation email for reservation orders.
If your organization prefers paper tickets, check out Thermal Ticket Printing.
Marketing Options
- Enter a genre into the input box, located under “Event Genres” (For example, “Musical”, “Country”, “Family Show”, “Subscription”, etc.). Your events will be categorized under these genres. Customers who buy a ticket to this event will be marked as interested in these genres for future marketing purposes. If you already have genres, click the check boxes next to your desired genres.

- Click “+ Create Another Genre”, if you want your event classified under more genres.
- Under “Select a Checkout Survey”:
- If you want customers to complete a survey with their transaction, and you:
- already have created surveys, then click on the drop down box and select your desired survey for this event.

- haven’t created any surveys, finish the rest of these instructions. Then click on Surveys in the left-hand menu to create a survey. After creating a survey, go back and edit this event to add a survey.
- already have created surveys, then click on the drop down box and select your desired survey for this event.
- If you want customers to complete a survey with their transaction, and you:
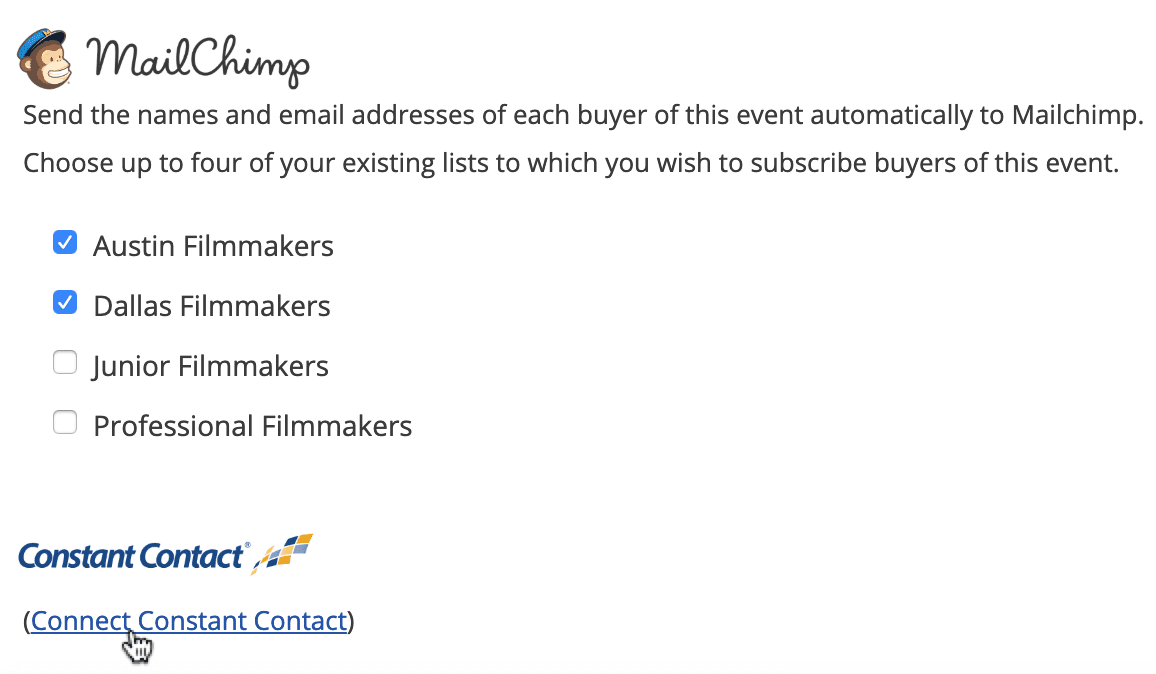
- Decide if you want to connect a MailChimp or Constant Contact account to ThunderTix. Mailchimp and Constant Contact are great marketing tools to update customers about upcoming events. Once connected to ThunderTix, your email lists will appear here. Additionally, once you select one or more of these, we’ll automatically subscribe buyers who opt in to your email lists at checkout.
Other Options
- If you would like to accept donations from customers for this event, click the checkbox, located under “Donations”.
- In the input box, located under the text “Customize the donation request below”, enter the text you would like customers to see above the donation field. (You might want to let them know if their donation is tax deductible. Or, maybe you want to say “Help us reach our goal of $5K to …”)
- If you want to tie donations made during the event purchase, select the campaign from the list. If you wish to allow your customers to select the campaign they want to donate to, select multiple or all fundraising campaigns.

- If you want to make all coupons valid for this event, click the checkbox. Note that you cannot undo this option once the event is created.

- If you would like patrons to need a coupon code to buy tickets, click the checkbox. This is a good option if you are having a pre-sale for a limited audience or for an invite-only private event.

- Click the checkbox, under “Public Attendee List”, if you want customers to be able to see who is going to the event. (Conferences or registrations commonly use this feature.)

- Look over your venue’s address as this is the address your patrons will see. Click change to edit if needed.
- Click the “Finish” button at the bottom of the page.
Congratulations! You have successfully created an event!