
Quick Start to Scanning Tickets with a Computer
To quickly begin barcode ticket scanning for an event using either just a computer or a computer and a USB or wifi scanner, follow these steps below. If you want to learn more information about the scanning options or how to scan using the Thundertix iOS and Android app, see the guide for the app below.
- Click the Scan In tab located in the left-hand navigation menu.
2. Select multiple events or a single event to scan tickets. You will be taken to a new page.
- Upon selecting a single event, you will be taken to a new page to select the performance date and time.
- If you select ‘Select Multiple Events’, you will be taken to a new page with all your current performance dates and times listed. Click the checkbox next to the performance tickets you wish to scan tickets for.

3. After choosing the desired showtime, with a connected USB barcode scanner, make sure the cursor is blinking in the input field, point the pistol at the barcode, and pull the trigger to scan the ticket. (Note: You can manually type in the barcode ID number if neither of the barcodes on the ticket are scannable.)
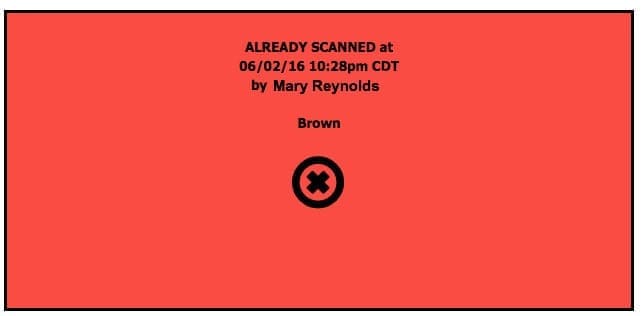
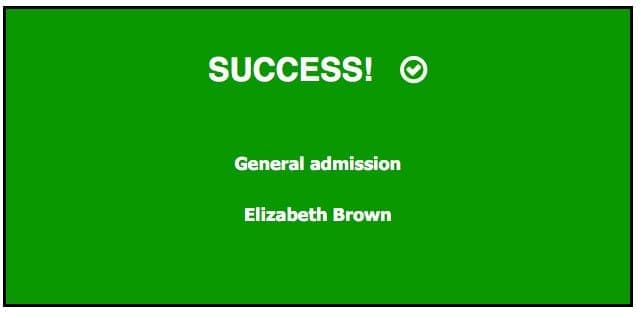
4. You will be shown either a green box, for a valid ticket, or a red box, for an invalid ticket. For valid barcodes, you will also see the type of ticket they purchased and the ticket buyer’s name appear.
Quick Start to Scanning Tickets with iOS or Android Device
- Download the “ThunderTix” app from the App Store or Google Play.
- Login with your ThunderTix account credentials.
3. Select the event that you’re scanning tickets for.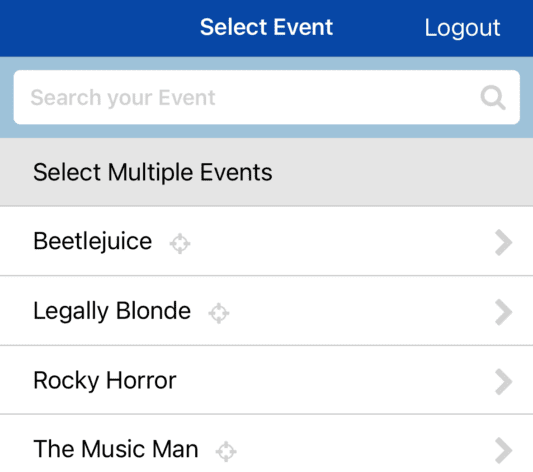
4. Choose your desired showtime.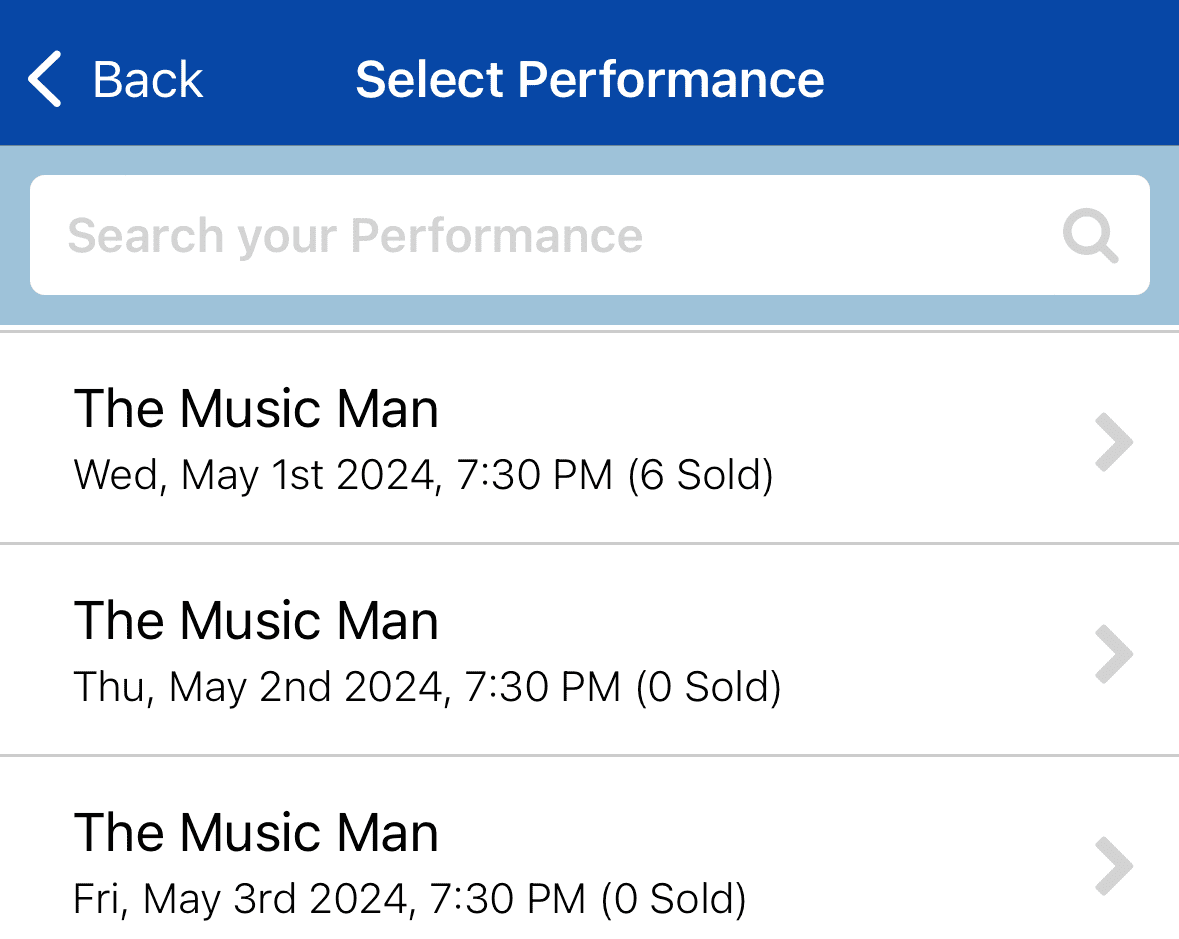
5. Direct the camera over the ticket barcode. You will be shown either a green box, for a valid ticket, or a red box, for an invalid ticket.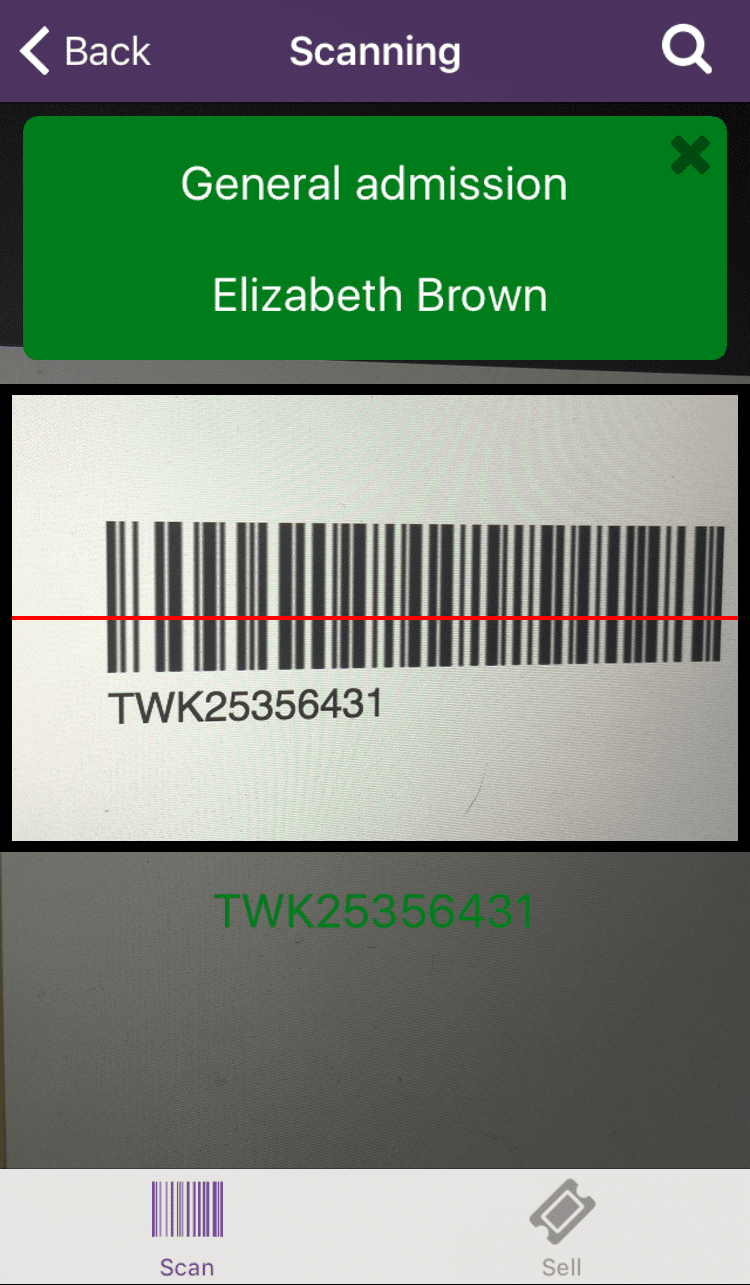
About Barcode Ticket Scanning
When you are checking patrons’ tickets on a computer with either a USB scanner or manually by their Barcode ID, name, or Order ID, you will need to use the scan page. If you are in need of a USB or wifi scanner, you should visit the hardware tab on ThunderTix to view our available scanners for rental or purchase. As an alternative to using a scanner and a computer, you can download the ThunderTix app to scan tickets. This app is free and is available on the app store for iPhones, iPads, and Android devices.
Scanning Tickets For a Single Event or All Events
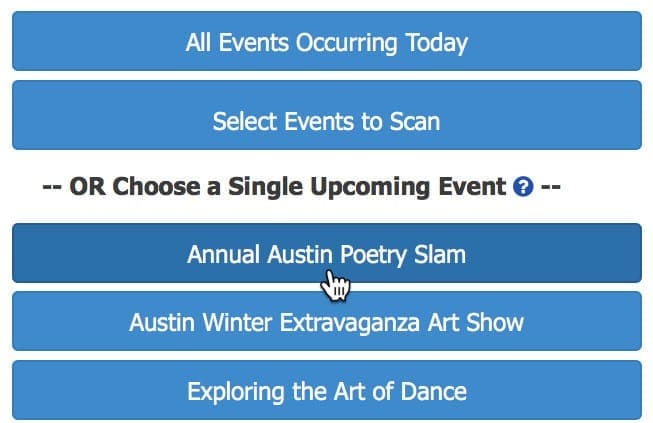
From the scan tab, you have two options. You can select multiple events occurring that day, or you can select a single event to scan tickets for. These options are shown, circled, in the picture below. 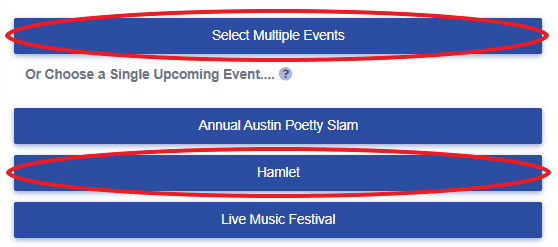
It’s important to know the difference between these scanning methods when utilizing the scan tab on the ThunderTix website.
- Scan a Single Event – This is the most widely used method of scanning and should be the choice in the following situations:
- If your venue has a single event and a single ticket type on a given night.
- If you choose to limit entrance by ticket type for a single event, say a limited number of VIP tickets and larger number of General Admission tickets, you can divide your gate entrances to give VIP ticket holders preferential treatment. General Admission ticket holders attempting entrance at a ‘VIP Only’ gate would be flagged as Invalid and can be routed to the appropriate gate.
- If your venue chooses to collect tickets at the gate and scan them the next day, this should be your choice, so your tickets will not be invalidated if scanning at a time other than the actual Event date.
- Select Events to Scan – This option allows you to choose one or more performances on the day that you’re scanning and should be your choice when:
- For example, if you have VIP tickets and General Admission created either as separate events or separate performances within the same event, and you wish to scan both types at a single gate
- If your venue has multiple Events occurring on a single date, you can scan all Event tickets from a single gate.
Scanning or Entering Ticket Barcodes
After selecting to scan for either all events today or a certain event from the Scan In tab, you will be taken to a new page, where you can scan a ticket barcode, type in the barcode ID and click scan, or type in a name or order ID and click the Look Up button.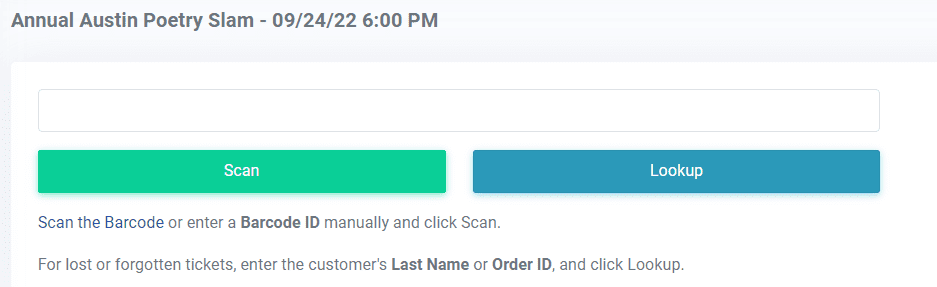
Staff at the gate or in the box office can make use of either input method to determine if a ticket is valid. Examples of the three validation types are as follows:
- Barcode ID – QAVP6130521
- Order ID – 3861361
- Ticket buyer last name – “Smith”
If you’re scanning a ticket barcode, it will automatically be found valid or invalid. If you enter in the barcode ID, you will need to click the scan button. You will then see a green box validating the ticket with the corresponding barcode ID and ticket purchaser’s name, or a red box. A red box may appear because that ticket is not applicable to the event (or any of that day’s events) or the ticket has already been scanned for admittance.
Scanning vs. Look Up
You can only click the Scan button if you’ve manually typed in a ticket barcode. If you’ve entered in a customer’s last name or order ID, you must click the LookUp Button.
The act of scanning a ticket barcode updates your records and is assigned an “admitted” or “used” status. Once admittance to an event is made, any further attempts to scan the same barcode ID will result in an invalid status being returned. If your handheld scanners are connected to the ThunderTix servers, the validation status updates in real time, ensuring the same ticket barcode ID cannot be used again at a different venue gate.
The act of performing an order lookup by one of the validation types does not assign an “admitted” or “used” status to the ticket nor does it update your records. It is important that staff know the difference between scanning and order lookups.
Looking Up a Last Name or Order ID
The Look Up function is extremely useful in situations when customers have forgotten their tickets and have no way of giving you the barcode IDs. Once you have typed in their last name or order ID, you will be presented with a list of all possible matches, without regard to event date.
Should the query be for a common last name (Example: “Smith” ) the list will display all ticket buyers with the matching last name, for all events. It is up to you or your staff to determine which of the multiple persons listed are being admitted. This is usually done by asking for the credit card used to make the original purchase or photo identification.
The steps required to look up an order by the order ID number or a customer’s last name are:
- Click on the “all events occurring today” button or the “select events to scan” button, or you can select a single event.
2. Choose your desired event time. (You only have to do this if you selected a single event.)
3. Enter in the last name or order ID.
4. Click the Look-Up button.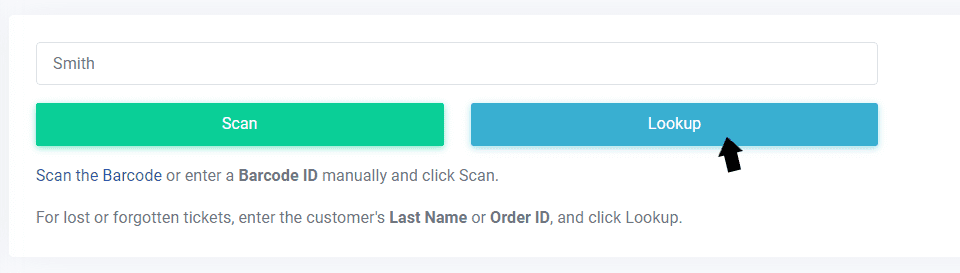
5. Find the desired customer.
6. Click the barcode ID under the “scan” text. This will scan the ID. You will not be able to click the ID if the customer’s barcode has already been scanned. Once you click it, you will see green text, stating what time the barcode was scanned and by whom.
How to un-scan a ticket
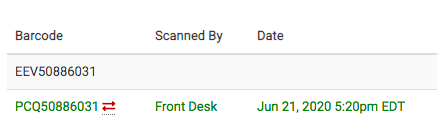
When you view any paid order, you can see a list of Valid Barcodes at the bottom of the page. These barcodes are generated for each paid order and delivered via email in the confirmation email itself or as an eTicket in PDF format. They can be used to scan in customers as they arrive. If you would like to reset the barcode for an individual ticket, go to the desired Order (using either the Guest List for the event or the Order search), then scroll to the bottom of the page. Identify the matching barcode that has been scanned. The scanned barcode appears in green and have two opposing arrows.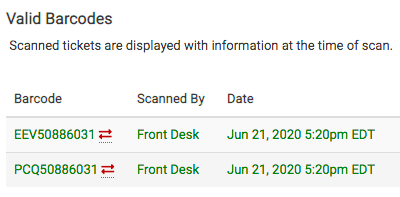
When you hover over the barcode, the instructions indicate that clicking the arrows will allow you to un-scan or reset the barcode.
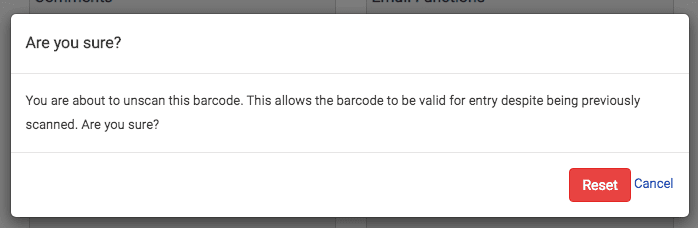
After you click on/tap the arrows, you will be asked to confirm if you want to reset the barcode. Click ‘Reset’ to confirm.
When you confirm that you would like to un-scan the barcode, the barcode will appear in black with no opposing arrows.
Need to reset barcodes so they can be used multiple times over multiple events? Check out the following discussion.
Using the ThunderTix Scanning App
To download the ThunderTix app, all you need to do is go to the app store on your iPhone, iPad or Android device and type “ThunderTix” into the search bar. Once downloaded, use your user login for the web application to sign in. You will be taken to a page listing all your events and at the top there is a search bar and an option to “Select Today’s Events”.
To begin scanning tickets, you can either tap on “Select Today’s Events” or you can tap one of your events in the list. (You can always type your desired event into the search bar, if it’s not near the top.)
Tapping on “Select Today’s Events”, will take you to a new page where all your events occurring today are listed. You can tap the switches next to each event and then tap the “start scanning” button at the top to scan tickets for those events you selected.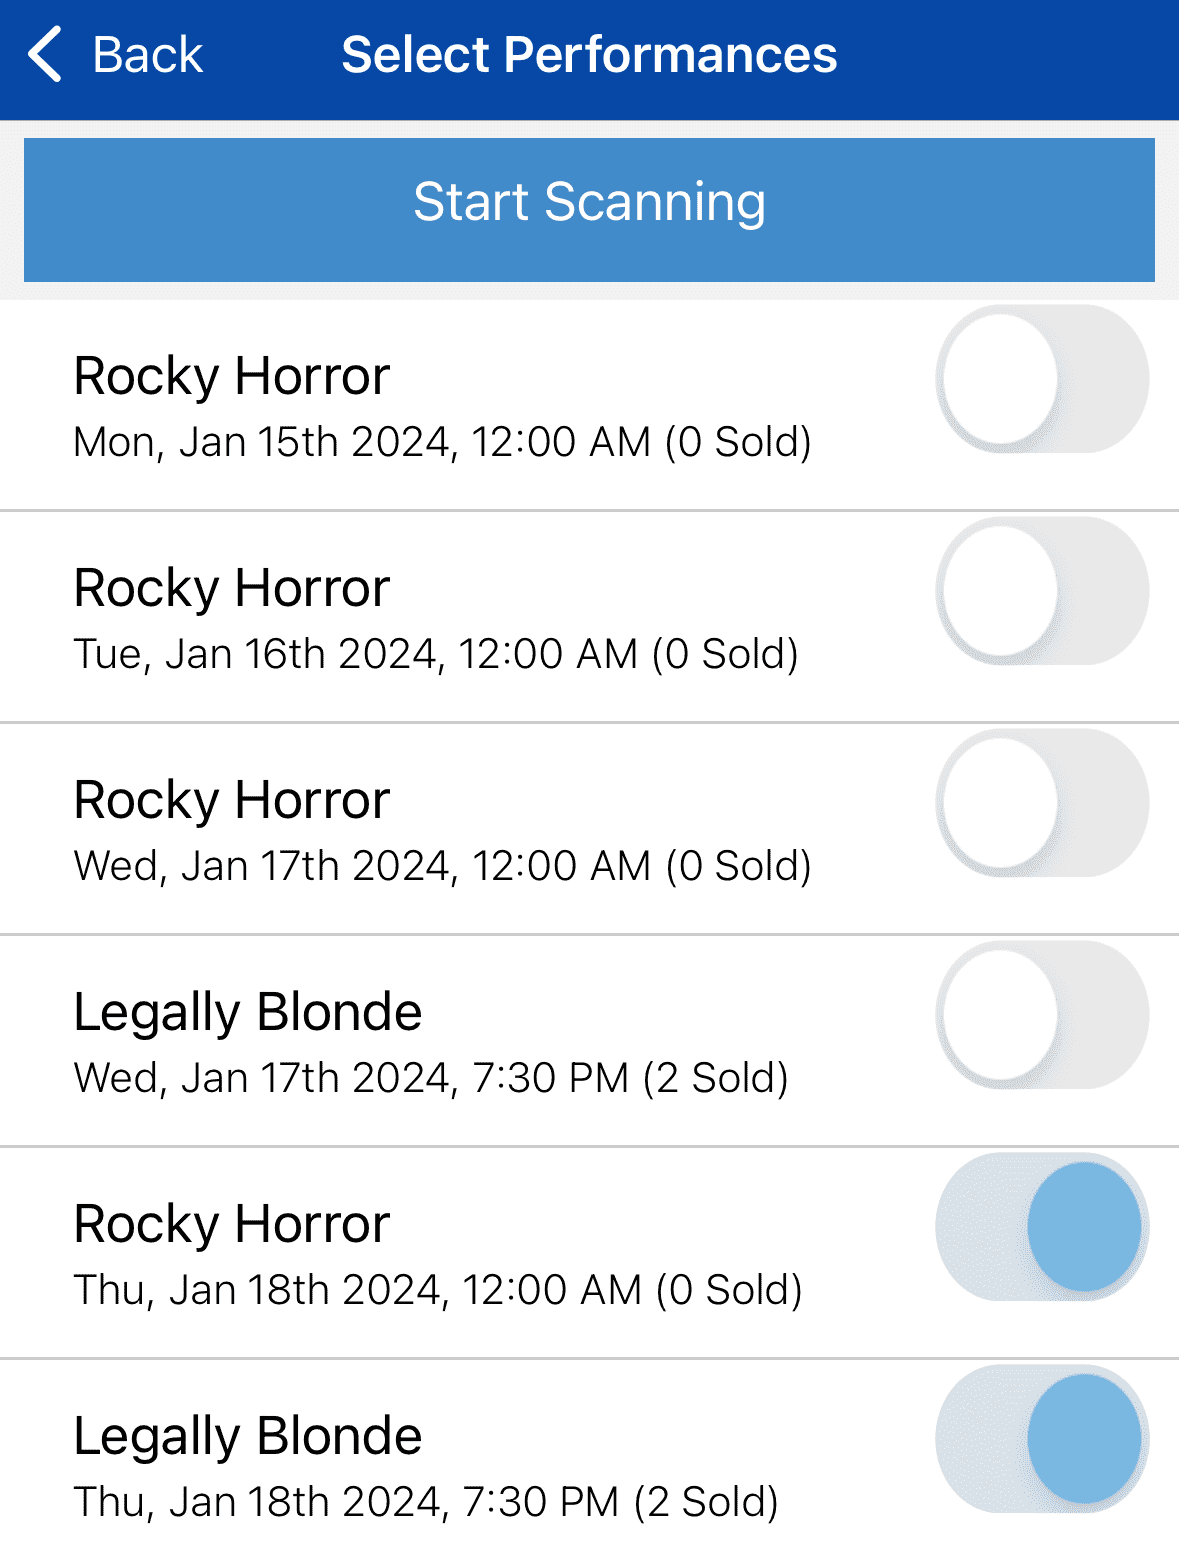
Then you need to direct the camera over the ticket’s barcode. You will then see either a green box, meaning it’s a valid ticket, or a red box, indicating it’s an invalid ticket.
If you tap on just one event to scan for, you will be taken to the page where you tap on the specific performance time that you’re scanning for.
Once you’ve tapped on your desired performance time, you will be taken to the scanning page. Then, you need to direct the camera over the barcode.
Scanning Multiple Ticket Types
Don’t worry if your events have multiple ticket types (Example: General admission, seniors and children), the results displayed by the act of scanning the ticket barcode will display the type. This allows you or event staff to direct the patron to a different admission gate, or ask for photo identification. Multiple ticket types are established during event creation, and may not be edited within the Scan Page. If you wish to find out more about event creation, visit our Creating Events How-To Guide.
Scanning Tickets For Multi-Day Events
If your event makes use of a ticket that gets scanned more than once over the course of two or more days, you may need to reset the event date daily to ensure proper ticket validation is displayed to staff at the gate. Re-setting an event date/time is performed in the ‘Events’ section of your account, under the ‘Dates & Times’ tab, then clicking “edit this date” text.