The orders page is an important place on ThunderTix. This is where you are able to view all the orders customers have made. The orders page has various uses. You can search for specific orders here. You can also export as little as one or as many as all the orders to a CSV (comma separated values) file. Furthermore, you can view all the details relating to a specific order. Once you are viewing a specific order, you can perform refunds, void an order, print PDF tickets, send the ticket to a new email, and more.
This guide should help you through these tasks. If you have further questions, be sure to read the orders section of our support forum. Here, you will find questions others have asked about orders. If your question hasn't already been answered, click on the "Submit Support Request" button, located at the bottom of the returned discussions list.
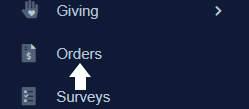
To begin, you first must click on the “Orders” tab, located in the navigation bar on the left side of the page.
Searching for orders is a primary function of the ‘Orders’ page, especially after your account begins to fill-up with ticket sales. Early on, when you first start using ThunderTix, the default list alone may be sufficient, without extensive searching. But once your total amount of orders are in the thousands, you’ll need to know how to search for orders.
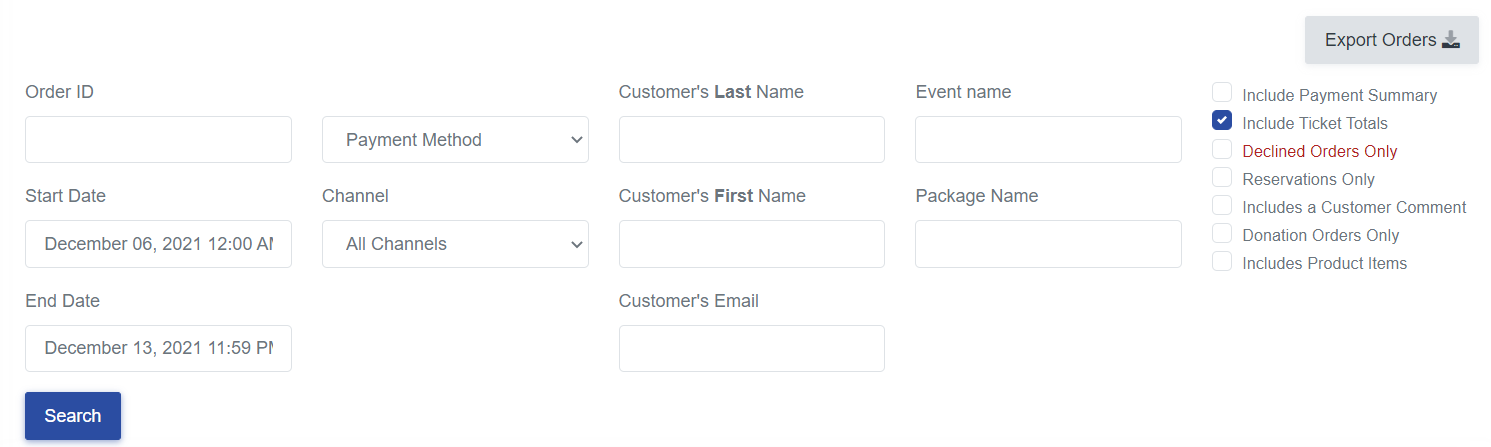
All searching will be done in the area shown below.
As shown in this picture, our search function is very customizable. You have the option of searching however you want, which can be a strict or broad search. You get to choose which criteria you search by. However, we do require one criterion for searching and that is the date range.
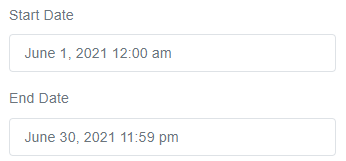
By default, we use a date range set from one week in the past to the present.
As a convenience, the most recent orders are displayed below the search fields. Should that not meet your needs, simply edit the date range for your search. Order searches are limited to a 365-day range.
To do this, you must:
This search will return orders placed between your selected start date and end date. Once you have clicked the search button, you can continue to change this date range or fill in other criteria you want to search by until you find your desired orders.
Note: Be sure to have the start date and end date in chronological order, oldest (start) to newest (end).
You will perform a broader search when you are looking for many orders at once. If you wanted to find all orders made by people who bought tickets to the same event, or all the orders where customers paid by cash, you would perform a broad search.
Searching this way is beneficial for several marketing purposes. For example, you can find out how many orders were sold via Facebook or your website, so that you can know where you need to be advertising more.
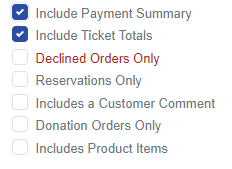
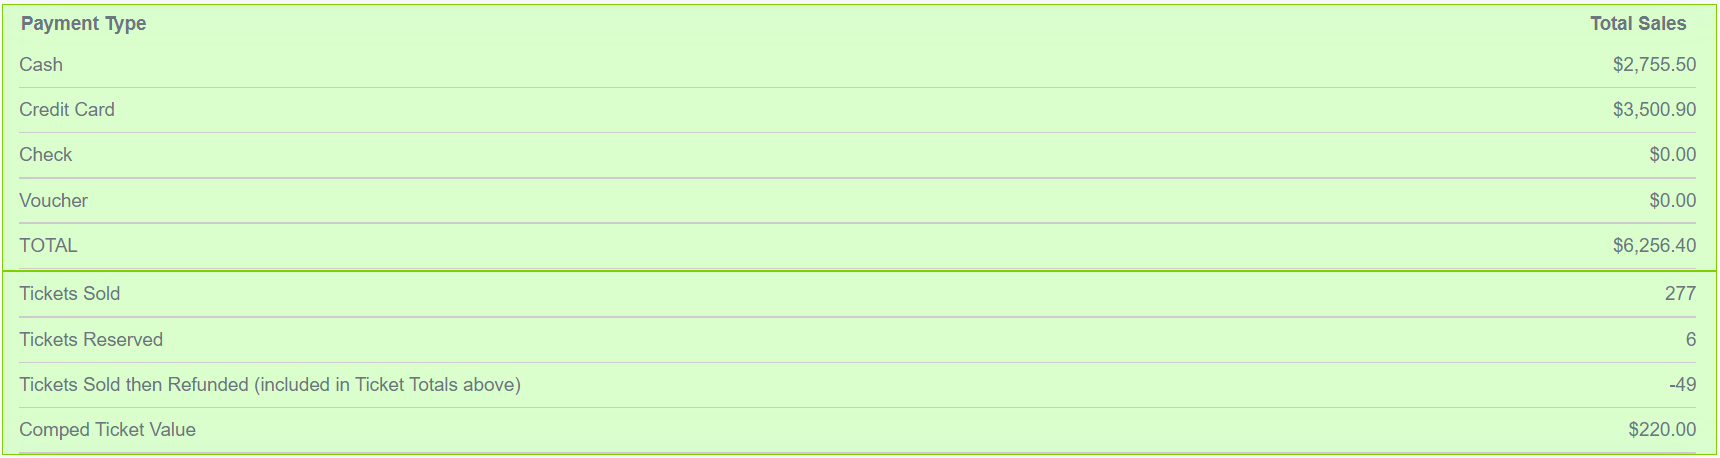
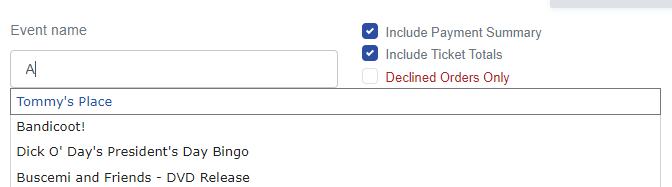
A useful feature of this page is that you can search for your desired orders and see how well you’re doing, either by ticket count or total sales dollars. To do this, you need to fill out your search criteria, and then simply check the “Include Payment Summary” and/or the “Include Ticket Totals” checkboxes. These are located to the right of the input box labeled “Event Name”.
Doing so will display the amounts at the top of the search results (shown in the picture below).
This feature can help you see how well an event is doing. To do this, you search by the event name and find all orders for that specific event, click those boxes, and then you’ll be able to see the total amount you’ve made for that event, and also how many tickets you’ve sold for that event.
While searching by broad criteria, you can search by how the orders were sold, how they were bought, what event the orders were for, and whether or not the order was declined and failed to become a sale.
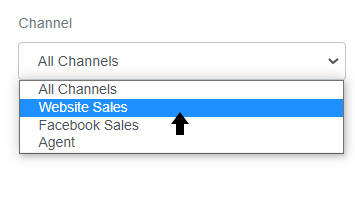
To search by how the orders were sold, you must:
This search (shown above) will return all orders sold on your website in the month of June.
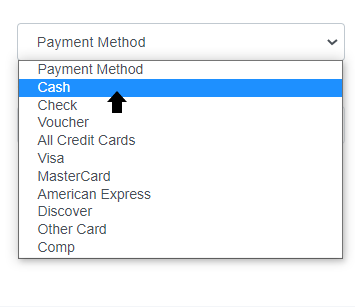
To search by how the orders were bought, you must:
This search (shown above) will show all orders paid for in Cash.
To search by what events the orders were for, you need to:
This search will show all orders that were for the selected event.
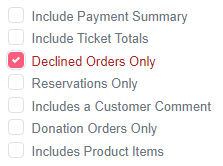
To search for orders that were declined:
This allows you to view the Customer's contact information and to also see the reason why an order was declined from the payment processor. Look for the red writing near the top of the Order as shown below:
Performing a strict search is useful when you are trying to find a specific order or a very small amount of orders. If one of your customers needed a refund or something similar, you can find their specific order if you search by their name or their order number. Additionally, in certain circumstances, such as when speaking to a ticket buyer on the phone for a new sale or for technical support to complete a purchase, searching for order information can be helpful.
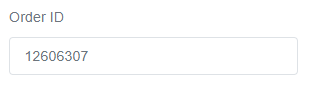
While searching by strict criteria, you can search by a customer’s first, last name, and/or email address. You can also search by a specific order ID.
To search by a customer’s first, last name, and/or email address you need to:
To search by an order ID, you must:
Exporting Orders is another principal function of the orders page. There are several important reasons for venues to export their orders. Exporting orders is extremely useful for marketing purposes. You may want to export all the orders for just one event or all orders that were sold via Facebook. You may also want to export all of the ticket buyer information (names, email addresses, etc.) for your mailing list, or all of your sales agents as part of month-end commission totals.
Another option is that you can export all your orders. Exporting all your orders as a .csv may be part of your business critical data back-ups, or you need to mirror years and years of sales on to a different computer. When you export all your orders, you are exporting hundreds of megabytes depending on the entire volume of sales. Remember that if you are exporting all your customers, make sure you have space for a large file on your computer. Also, please be patient, it will take a moment to create a file of that size.
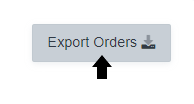
To export your orders, you’ll want to perform a search for one or more orders. Then, you can export up to 200 pages of orders and save the data to your desktop computer as Comma Separated Value file. The .csv is formatted to be compatible with the majority of spreadsheet software programs. Exporting orders as a comma separated value (CSV) file is primarily for use with accounting or spreadsheet sheet software like Microsoft Excel. Once you have exported the file, you can then import it into your desired software.
To export orders, you must:
Note: By default, the csv file is saved as a generic filename. It is suggested you type a unique filename as to not overwrite one of your existing files.
Once you have searched for the order or orders you want to find, you will see all your desired orders and a few details of that order on the orders main page. Under each specified column, you can see the order ID, the customer who purchased that order, any admin comments, the agent (box office employee) who inputted all the customer information, the event the order was for, the date, how the order was paid for, tax, the total paid, and if the order was paid for or not.
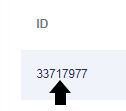
If you want to view more specific details about the orders, you can view information like the customer’s address, their answers to a survey or their tickets scanned. To see all this information, all you need to do is click on the order number, located in the furthest left column of the page, labeled “ID” (as shown in the picture below).
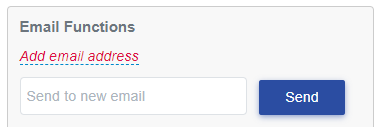
You will then be taken to a page where all this information will be displayed. At the top of the page, it will show the tickets bought, how much they were, and how much the customer paid. If you scroll down, you will then be able to see headers for “Billing Address” and “Shipping Address”, “Comments”, “Email Functions”, “Order Change Actions”, “Survey Answers”, “Browser Information”, and “Valid Barcodes”. Under each header, you will find the corresponding information. At the bottom of the page, you will see a section showing the ticket barcodes and if they’ve been scanned or not.
It is on this page with all the specific details of the order, that you can provide an exchange or refund, void an order, send tickets to a new email, and print the PDF forms of this order’s tickets.
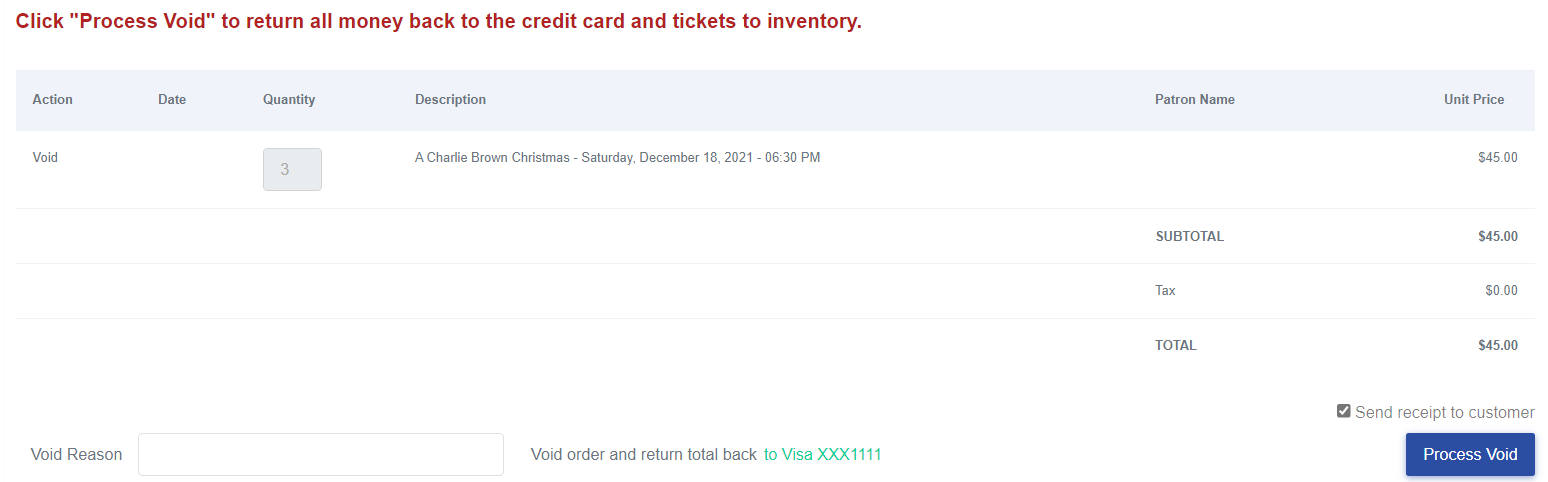
Before you decide to make an exchange, refund, or void an order, you should know the differences between these actions. An exchange is usually performed when a customer wants to change their seat for the same show or exchange their ticket for the show to a different night. A refund is done when a customer wants their money back for at least one of their tickets purchased. Voiding an order is done within 24 hours of a customer’s order. You usually want to void an order when a customer has bought tickets to a wrong event or something along those lines. Voiding an order will fully refund the customer.
To provide an exchange, you must:
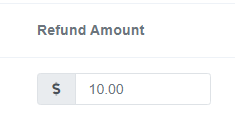
To provide a refund, you must:
To void an order, you must:
The system will then automatically return the tickets back to inventory for that event and will void the credit card transaction before it settles with the payment gateway.
To send the ticket confirmation to a new email, you must:
The page will reload, telling you that the confirmation was sent to the new email, as well as to the original address and to the venue admin.
To print the PDF ticket(s) , you must: