Learn more about your audience by using our survey feature at the time of customer purchase. For example, how did your customers find you -- Facebook or word-of-mouth? After the event, use our automated email to understand what they loved (or disliked) about your event or venue. In this guide, we'll share how to create surveys and use them to gather audience insights that help drive decision making around marketing or the types of events you offer.
Creating a New Survey
Creating a survey is easy! Let's get started.
1. From the left hand main menu, click Surveys. then click the large green button “+ Create Survey”, and you'll come to our survey creation page.
2. Enter a unique and meaningful name for your survey. For example, “Poetry Slam 5 Coupon User Survey – October 2023” provides context and a date to help you easily recognize the survey.
3. Will the survey be shown during the purchase process, or will you be sending this in a post-event follow-up email? Choose the appropriate option.
4. If you've selected to apply the survey to the purchase process, you will need to specify how often during a purchase a customer may need to enter survey data. For example, you might have two different theater summer camp events -- a "Teen Summer Camp" and a "Child Summer Camp" -- and you need the ages of the children being enrolled. For parents with two children enrolling one child in both camps, they would need to answer the survey question specifying the child's age. Select the option -- "Apply survey singly to all performances purchased."

Alternatively, if your survey asked, "How did you find out about us?", you would ask this question one time regardless of the number of performances purchased.
5. By default, surveys are set to Active. If you don't want the survey to be active, change the toggle to Inactive.
6. Enter your desired question, such as “How did you hear about us?”
7. Next, you need to specify the type of answer you would like. An open field survey will allow the customer to type any answer they want into an input box. A drop-down survey will allow the customer to select an answer from a drop-down menu of choices you chose.
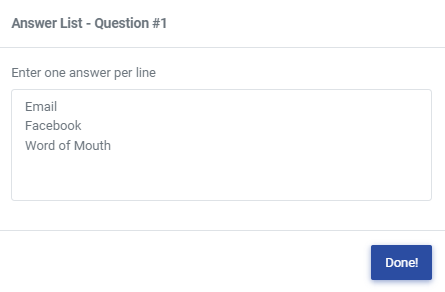
If you selected the drop-down option, then enter your pre-created answers with one answer per line as shown below.
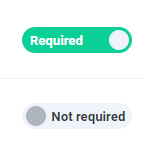
8. If you want the answer to your question to be required, click the checkbox underneath the text “Required”. We advise against requiring an answer, as it can impede the checkout process. Only require answers when the information is critical information. For example, the age of a child might be necessary while understanding how a patron learned about your event is not.
10. Repeat steps 6 through 9 for each question in your survey.
11. Click the “Create” button at the bottom of the page.
Congratulations, you have now successfully created your own custom survey!
Editing Surveys
Editing a survey is as easy as creating one!
1. Go to the Survey's page in the main left hand menu.
2. Click “Edit” for the appropriate survey. You will see that this looks exactly like the original creation page, and the editing process is also identical.
3. Click on the input boxes any question or answer and enter the desired text.
4. Click the “Update” button at the bottom of the page to save.
Activating and Inactivating surveys
If a survey is no longer applicable and will not be used in the future, you can inactivate it. All data will be retained from the answered surveys. Further, if the survey is being used in existing events, it will remain there unless you remove it from the event itself. The purpose of inactivating a survey is simply to prevent its use in future events and packages.
1. Click on Surveys in the left menu.
2. Then, click “Edit”. You are then taken to the original survey creation page.
3. Change the toggle from Active to Inactive for "Is this survey active?"
Viewing Survey Responses
Once you’ve created your surveys, you’re going to want to see all the responses you’ve received. To view survey responses, you must click on the survey you want to see the responses to.
You will then be taken to this page shown below. From here, you can view all the responses to the survey. All you need to do to view every response is scroll up and down.
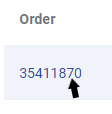
If you want to see more details about a customer’s specific order, then click on the order number.
If you want to be taken back to the event page, where you can sell tickets to specific performances, then click on the event name.
Exporting Survey Responses
Once you have received all your responses, you may want to export the list of responses into a separate file so you can access it from your hard drive easily.
To do this, you need to:
1. Click on your desired survey.
2. Click the export button, located in the right-hand corner of the page. Your computer will then prompt you to save the file on your local hard drive.
3. Make sure you save the file to your desired location on your computer.
Note: By default, the file will be saved using a generic filename. It is suggested you type a unique filename as to not overwrite one of your existing files.
Using Surveys to Your Advantage
Ultimately, the goal of a survey is to gather information to improve your business or to better serve your customers. Learning how users found out about your event or being alerted to food allergies are important before the event.
After the event, you have the opportunity to learn how customers felt about the event itself. (Make sure you use our free, automated Net Promotor Score survey that asks, "How likely are you to recommend us to a friend?") With surveys, you might ask if a staff member was extra-helpful or ask about the cleanliness of your venue. Answers to these questions helps create actionable steps to improve on the customer experience.
Additional Points
It is best to keep your surveys short and optional. Requiring customers to complete surveys or making them answer multiple questions has been proven to reduce sales. Limit your surveys to one or two optional questions. Only make surveys required if these questions are essential. A good example of an essential required field would be to ask “Do you have any food allergies?” for an event that serves food or includes it as part of a ticket purchase. If you are unsure if questions should be required, that is a good indicator that they should not.
Writing survey questions that are helpful and useful to your business takes time. Here are the main points which are directly applicable to all surveys you create with your ThunderTix account:
- Have a defined purpose
- Keep It Relevant
- Make Your Questions Short and Sweet
- Use Simple, Precise Language
- Use Open-Ended Questions Sparingly and Intelligently
Survey Appearance
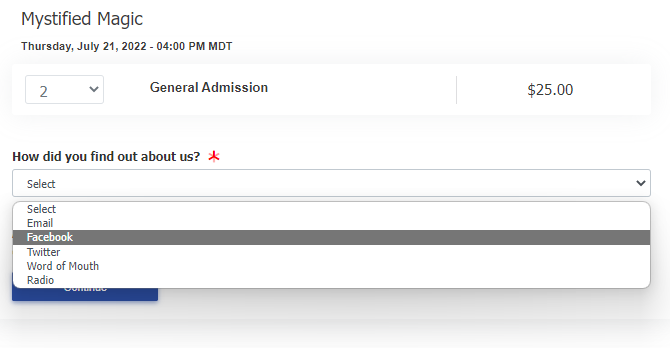
The survey will appear on the ticket selection pages as shown below. We've included two sample events using the two answer types below -- open ended and drop down.


